Upload Website to Amazon S3
Posted: December 29, 2016
Upload Your Website to Amazon S3
Once you have your website ready to publish, you need to move it to the server so that everyone in the world can see it. In this case we are using Amazon S3 to host a static website. To do this we need a way to move all the files and folders from your computer to the Amazon S3 bucket that we already setup as a web host.
In this post we will setup the software and permissions needed to upload and manage your website files on Amazon S3.
Method 1 - Use the Amazon Web Services (AWS) Console
You could upload your website directly to your bucket through the AWS console after you log into your account. Simply navigate to your bucket, click the blue Upload button and drag and drop the files from your folder on your computer to the browser window.
Don’t drag in the one folder that contains your entire website. Open that folder and highlight all the files and folders that make up your website. Drag and drop those directly into your S3 bucket that is enabled as the web host.
This method works OK for very small websites that have very few files and folders and you don’t need to go back in and update them very often. However, this method will get very time consuming if you need to edit the files and upload them often. The preferred method is outlined below.
Preferred Method - Use an Amazon S3 Browser
A S3 Browser is software you download to your computer and configure to interact with your S3 bucket. In manages all the hassle of logging in, deleting, and moving files for you. I prefer Cyberduck, but there are many different options including extensions for Chrome and Firefox. No matter what you choose the process is very similar. The instructions here assume you have downloaded and installed Cyberduck.
Setup Permissions in AWS to Access Your Buckets
We need to first create users in the AWS Identity and Access Management (IAM) console.
Open the IAM console and make sure your on the Users page, Click Add User
-
Give the user a name. “Cyberduck” is a good user name.
Check the Access type of Programmatic access.
Click Next: Permissions.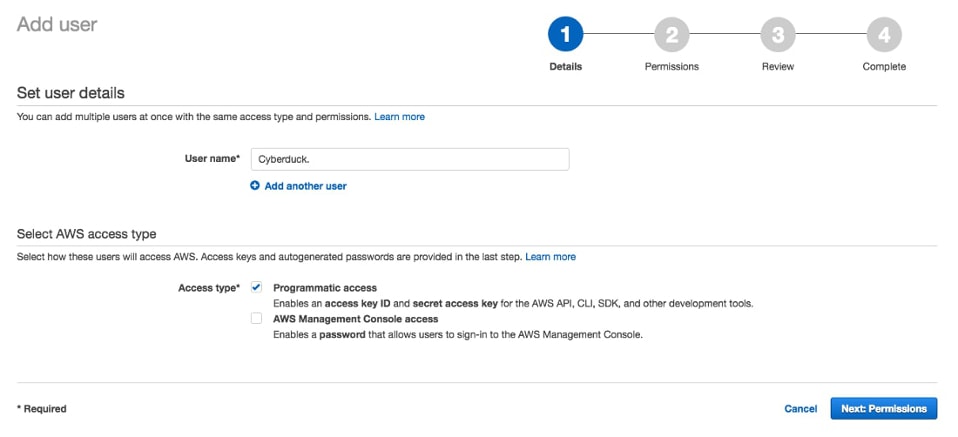
-
Select the third option to Attach existing policies directly.
Type in S3 in the search field.
Check the AmazonS3FullAccess check box.
Click Next: Review.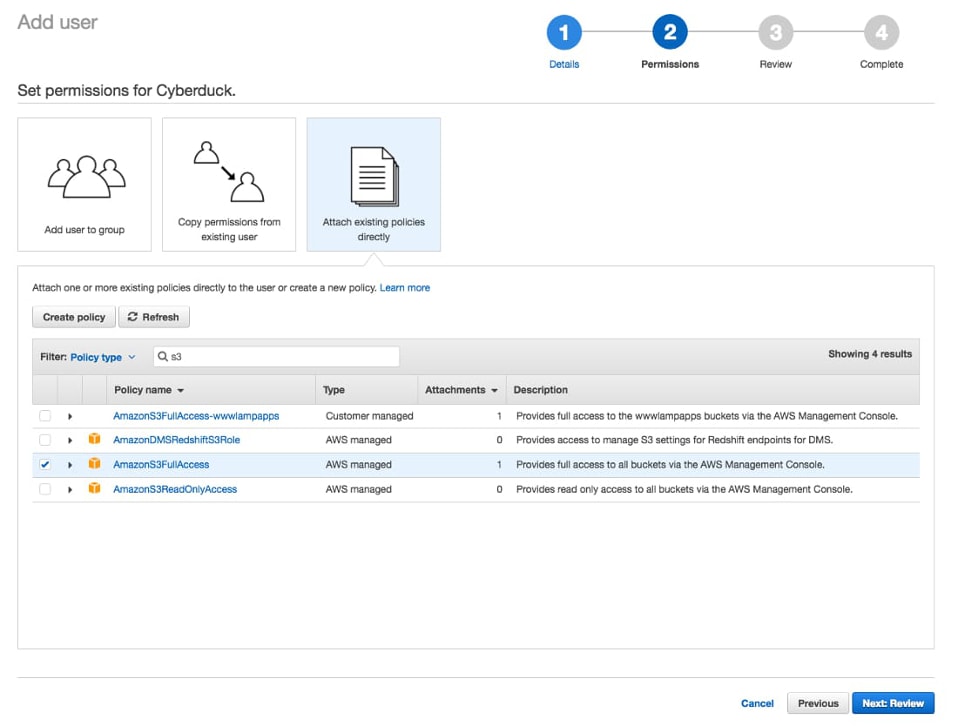
-
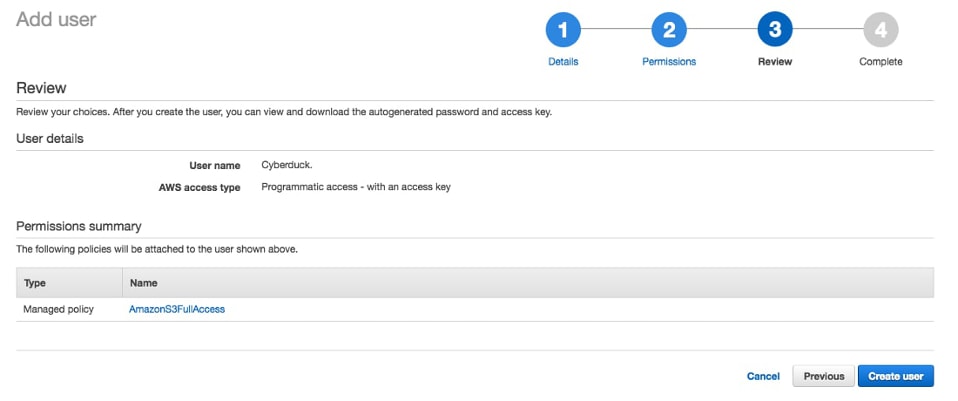
Click Create User.
-
Copy and save the Access key ID and Secret access key.
These will be entered into Cyberduck to allow it to access your bucket.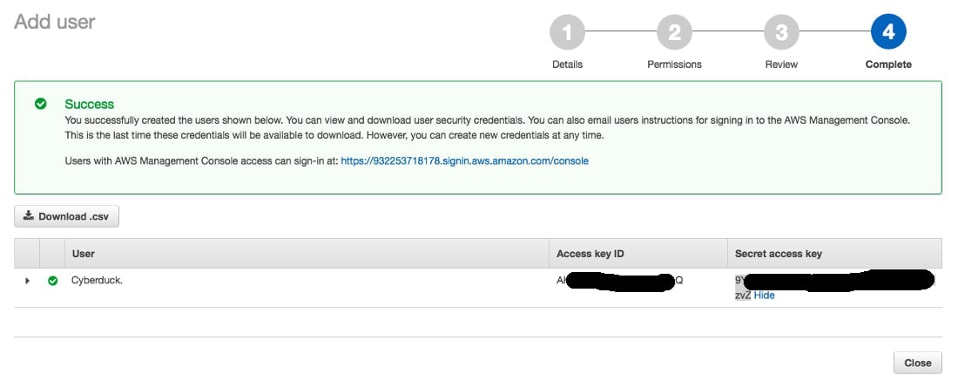
You can leave this window open and cut and paste the Access and Secret keys into Cyberduck. Once you close this screen, you can never access the Secret key again. You can create a new one, but never will you be able to see this one again unless you save it somewhere else.
Connect Cyberduck to AWS S3
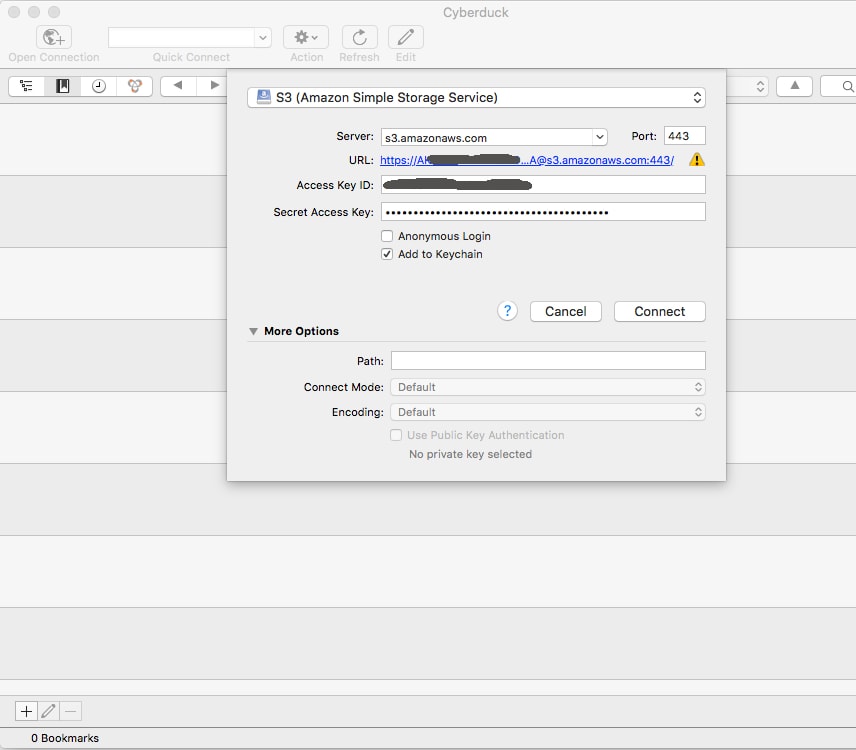
You will now enter the Access and Secret keys you created into Cyberduck so that it can connect with your AWS S3 buckets.
These instructions are for a Mac computer, Windows may be slightly different.
- Open Cyberduck
- Click Open Connection
- In the first drop down selection field, select S3 (Amazon Simple Storage Service)
- Enter your Access Key ID and Secret Access Key, then click Connect
- In the menu bar, select Bookmarks and save this for future use.
- You will now be able to drag and drop files directly to your bucket from your desk top.
Upload and Test Your Website
Once you have moved all the files and folders over to your bucket, you should open your browser and use the temporary Endpoint for your bucket to view the website.
This bucket must be configured as a website host, as covered in a previous post.
If you need to modify the website you can simply drag and drop the updated files on top of the old files, overwriting them.
Once your website is completed the next step is to point your domain name to your Amazon S3 bucket.
I would love to hear from you. Please leave your comments below. You can also share this post on Facebook and Twitter.